Project Task - the Singing Fruits
A tone represents a regular and even vibration (movement) of a sound source.
A tone is a sound, which has a specific:
pitch - determined by the speed and the number of vibrations in a second. The higher the number of vibrations, the higher the sound, and vice versa. The human ear can hear from 16 (the lowest tone our ear can discern) to 20 000 (the highest tone our ear can discern) vibrations/second.
intensity - depends on the size of the amplitude of the sound source. The bigger the amplitude, the louder the sound. The tone intensity is also influenced by the pitch. Deeper tones are heard significantly less than higher tones.
duration - depends on how long the sound source vibrates. When it calms, the sound stops.
color - depends on the type of material, shape and size of the vibrating sound source.
We will make a musical instrument by using the Micro:bit device, and we will use it to play a (musical) scale.
A (musical) scale represents a series of eight consecutive tones (seven tones with different names, and the eighth which is the repeated name of the first one) arranged into octaves. Tones in a scale can be read alphabetically or according to solfege. Alphabetically, the tones are: c, d, e, f, g, a and h (b in some countries), and according to solfege: do (or ut), re, mi, fa, sol (or so), la, si (or ti), do. We will use the Micro:bit to produce the octave C, D, E, F, G, A, H (B).
To make our piano, we will need:
4 Micro:bits
headphones
crocodile clips
fruits (8)
aluminum foil
In order to make the Piano (Singing fruits), first, we need to prepare the physical device composed of different fruits, on which we will play, and Micro:bits.

Connecting Micro:bits to fruits (types of fruit which have a lot of liquid) and headphones:
Spet 1: We can connect the first Micro:bit by connecting the grounding (GND) to the headphones with the pin (GND) using crocodile clips. The figure below represents the connection between the grounding and the Micro:bit (only for one device). GND is the grounding, which protects the Micro:bit from the electric shock. We will connect it to a wire, which will serve as the grounding. In addition, we need to connect the Micro:bit to the headphones via PIN0. We will connect the crocodile clips to the PIN0 and the headphone jack (on top of it). It is very important to make sure that the clips on the headphone jack are not touching.

Step 2: For the second Micro:bit, connect the crocodile clips to the GND and the wire and then connect it to the banana (the end of the clip insert into the banana). Connect the Micro:bit to three oranges to PIN0, PIN1, and PIN2 via crocodile clips.
Step 3: For the third Micro:bit connect the crocodile clips to the GND and the wire. We connect the Micro:bit to the orange through PIN0 via a crocodile clip. Connect the two oranges to PIN1 and PIN2 of the Micro:bit by using crocodile clips.
Step 4: For the fourth Micro:bit connect the crocodile clip to the GND and the wire. We connect the Micro:bit to the orange through PIN0 via a crocodile clip. Connect the two oranges to PIN1 and PIN2 of the Micro:bit by using crocodile clips.
Now that we have constructed the actual (physical) piano (Singing fruits), we need to create programs for each Micro:bit.

Programming
We need to program each Micro:bit separately, so they communicate and produce sounds.
Step 1
Go to https://makecode.microbit.org/.
Step 2
Create a new project. Now, we want to program Micro:bits to send information - corresponding numbers (for corresponding tones) when a specific PIN is pressed. In addition, we need to program Micro:bits to communicate with each other. This way, depending on the number (tone) Micro:bits “produce”, or more accurately send, the Micro:bit will receive that number, and the headphones will reproduce the desired tone.
Step 3
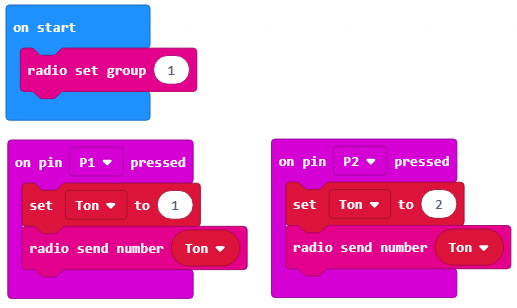
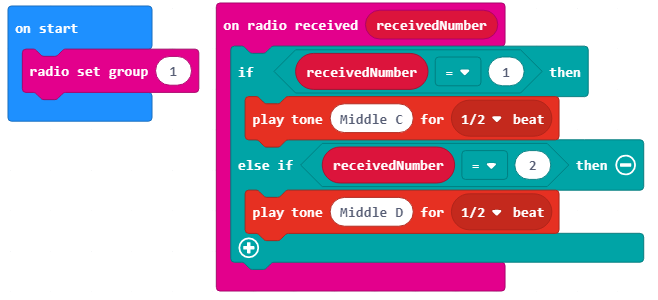
When we want to establish communication (to use the radio communication) between Micro:bits, all included Micro:bits have to belong to the same group, i.e. they have to use the same group ID. By creating the ID group, we are actually creating the space in which the devices will communicate.
To create an ID group, we need to drag the block 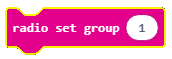 from the category
  into the block
  from the category
  . Into the space
  we type the desired number for the group ID. This can be any number. We will leave the number 1. This way, we have created the group with the ID 1 in which all Micro:bits will communicate.
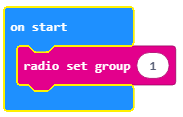
The part of the code, which creates the group for communication:
Step 4
We need to add the block 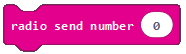 to the part of the code, which is designed to register an event (when the fruit is touched), in order to send the radio signal to another device based on which this other device will “react”, i.e. when we touch (press) the fruit we will hear a tone.
The event will be registered when one of the pins on the Micro:bit is pressed. To achieve this, we need to introduce the block 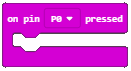 from the category
  . From the drop-down list of the block we will choose the pin (P0, P1, P2), which initiates the event - sending the number (tone) that will be displayed.
We need to define the way we will present (store) values of the desired tones (Middle C or 262, Middle D or 294, Middle E or 330, Middle F or 349, Middle G or 392, Middle A or 440, Middle H (B) or 494). Apart from this, we also need to define values for each of the notes mentioned above. We can solve this problem by introducing the variable.
A variable can be understood as a space in the computer memory, something like a box, in which, during the execution of the program, we can store some interim values. Variables have names. When we want to use the value of the variable, it is enough just to use its name.
A variable is created in the following manner, in the category Variables (1), click on the button Make a variable (2) and type in the name of that variable in the field (3), in our case the name Tone. By clicking the button OK (4), you have created a variable (5).
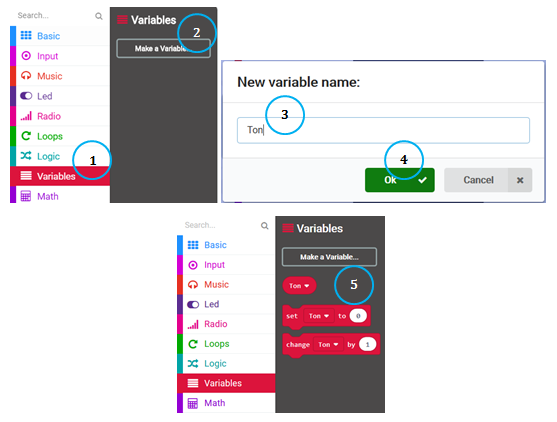
The value of the variable Tone will go from 1 to 8.
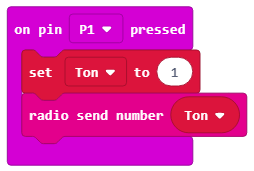
In case P1 pin was pressed, we will set the initial value at 1 for the variable Tone, by using the block 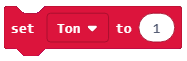 .
.
We can send a radio signal to the Micro:bit by using the block , next we will drag the variable Tone, which we want to send, into the part  , i.e. we will create the
 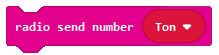 block.
We create the block:
The same procedure should be used for the P2 pin. However, we will set the initial value of the variable Tone at 2, if the P2 pin is pressed.
The look of the code for the piano keys (C, D):
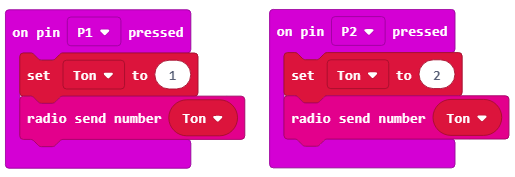
The final look of the program, which sends information about which pin has been pressed (P1 or P2):
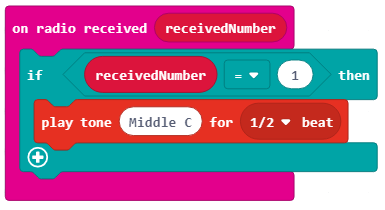
The next step is for the Micro:bit to receive the information (in our case a number) based on which it will “react” and produce a sound.
For this, we will drag the block 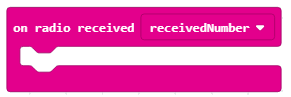 from the category
 Radio. Depending on the received number (1 or 2) this Micro:bit will reproduce the desired tone.
We will use the block 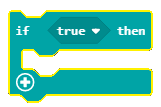 from the category
  for this.
Into the condition input field we will drag the  block, which is used to check whether pin
 P1 was pressed or not:
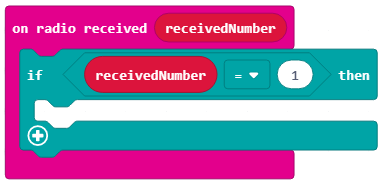
If the P1 pin is pressed the tone C will be heard. We achieve the tone reproduction by dragging the block  from the category
  , which is used to reproduce the sound. In the drop-down list of this block we will choose the tone and the duration of the sound:
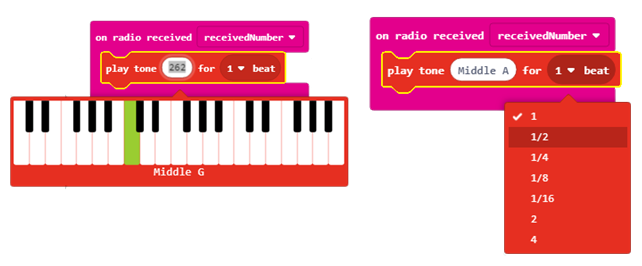
The look of the block:
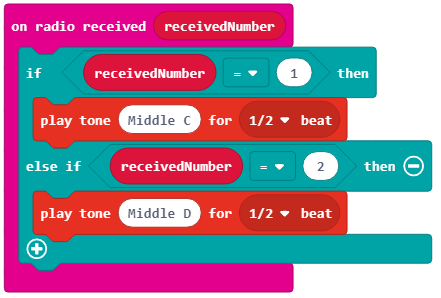
We will add one more condition (P2 pin pressed) to the block by clicking on the sign  . If the
 P2 pin is pressed, the tone D will be reproduced.
The look of the block:
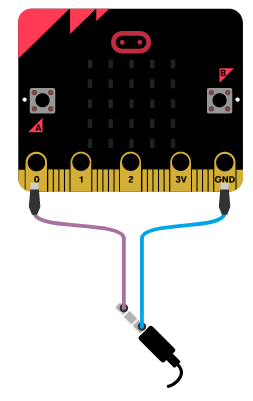
Note: The Micro:bit has to be connected to the speakers or headphones, as shown in the figure below, for the sound to be reproduced.
The final look of the program for the reproduction of tones C and D:
Download the .hex file to your computer by clicking on the button  . The Micro:bit will be ready to start working once you have dragged the file onto it.
We hold the banana in one hand and use the other hand to play other fruit.
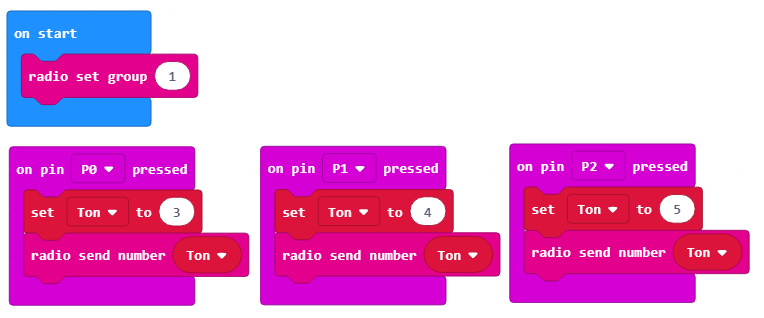
We can program the remaining two Micro:bits the same way, for the tones Middle E or 330, F or 349, Middle G or 392, Middle A or 440, Middle H (B) or 494.
The final program code for the Micro:bit used to send the information about which pin has been pressed, based on which tones E, F and G will be reproduced:
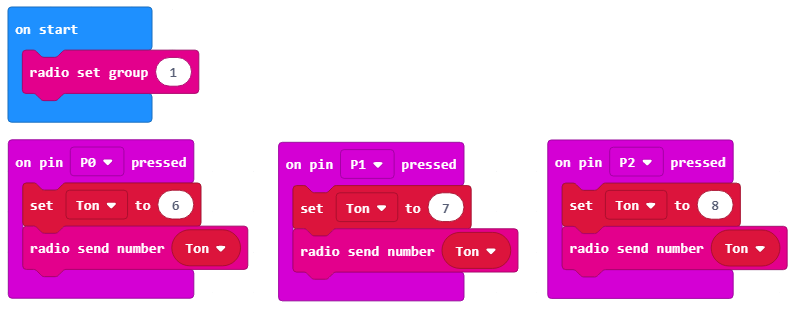
The final look of the program code for the Micro:bit used to send the information about which pin has been pressed, based on which tones A, H (B) and C will be reproduced:
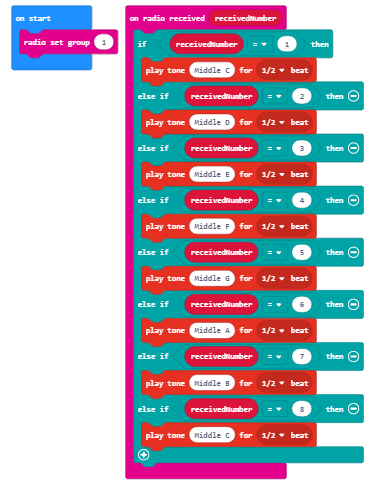
After all of this, you will have to upgrade the code for the Micro:bit used as the sound “broadcaster”:
Once we have connected all the fruits and downloaded all the codes, we can play some nice song on our fruit piano.