0. Running Jupyter notebooks
In this short lecture we show three ways to (download and) run Jupiter notebooks that accompany this course. This gives you the opportunity to go through the interactive version of the lectures and experiment with the examples we discuss in the course.
We shall cover three possibilities to run Jupiter notebooks of this course:
- using the Binder service available at mybinder.org (this is convenient because there is no need to install new software on your computer or to create an account; the downside is that the changes you make while experimenting with the notebooks will not be saved);
- using the Azure Notebooks cloud service (this is convenient because there is no need to install new software on your computer; however, you are requested to create a free Microsoft account, but in return all the changes you make to the notebooks will be saved within your Microsoft account); and
- locally, on your computer (requires the installation of Python and Jupyter).
0.1. Running Jupyter notebooks using the Binder service
The easiest way to run Jupyter notebooks that accompany this course is to click on the link below:
https://mybinder.org/v2/gh/Petlja/JupyterBookEng/master

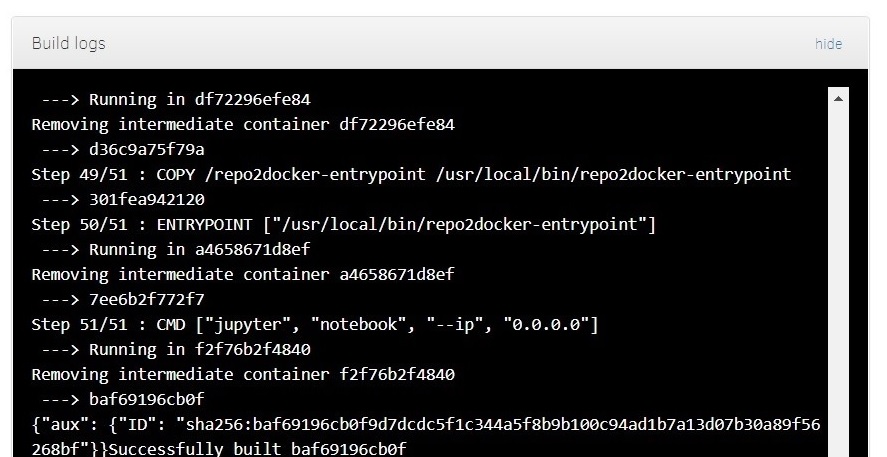
The service will make a fresh copy of the Jupyter notebooks for you and it will prepare the environment in which the notebooks can be executed. All this takes some time, however:
You will recognize that the preparation is over when your default web browser pops up and displays a page that looks like this:
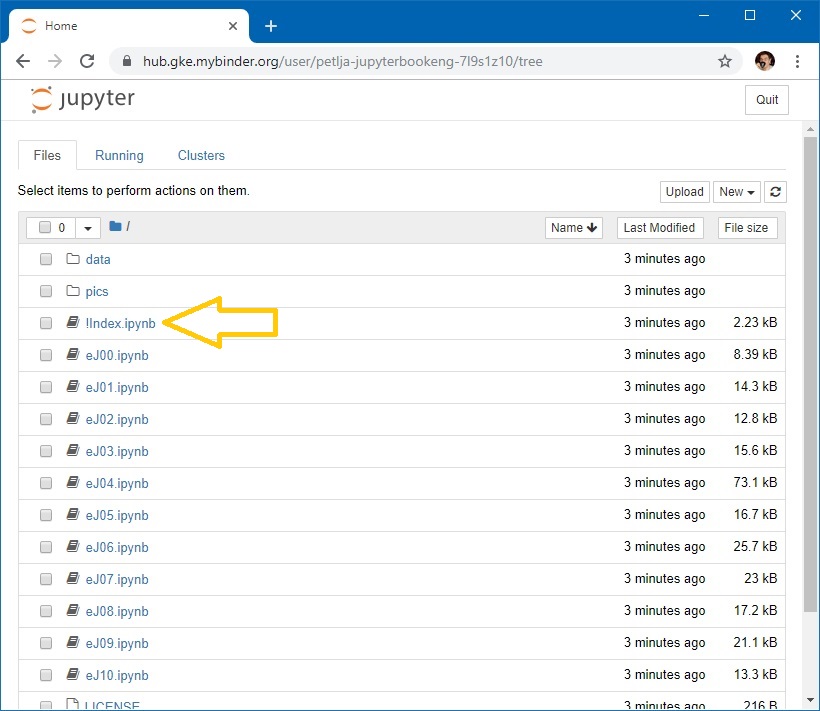
You can now click each of the links to run the notebook in a new tab. Switch to the tab that contains the notebook and execute it step by step.
This approach is convenient because there is no need to install new software on your computer or to create an account; the downside is that the changes you make while experimenting with the notebooks will not be saved. And preparing a fresh environment might take some time.
0.2. Running Jupyter notebooks using the Azure Notebooks cloud service
Jupyter notebooks that accompany this course can be executed in a cloud service such as Azure Notebooks. This makes it possible for you to save the changes you made to the notebooks in the cloud. There is no need to install new software on your computer, but you are requested to create a free Microsoft account (unless you already have one).
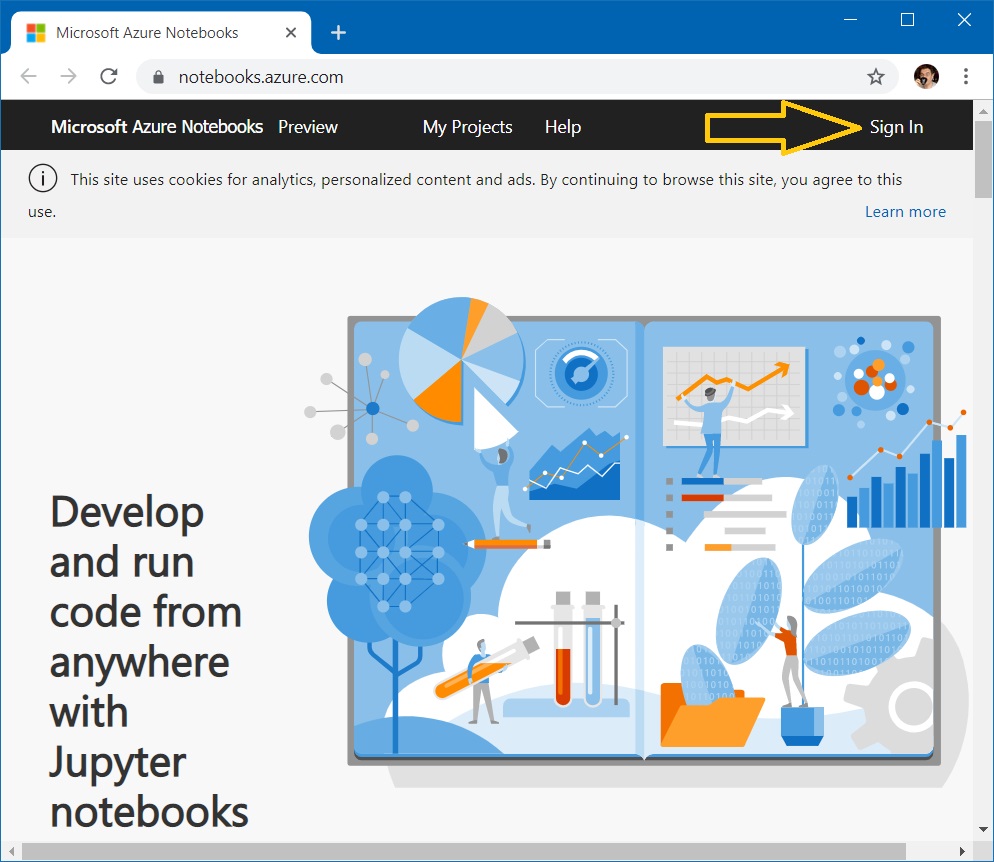
Step 1. Click the following link:
and create a (free!) account (unless you already have one).
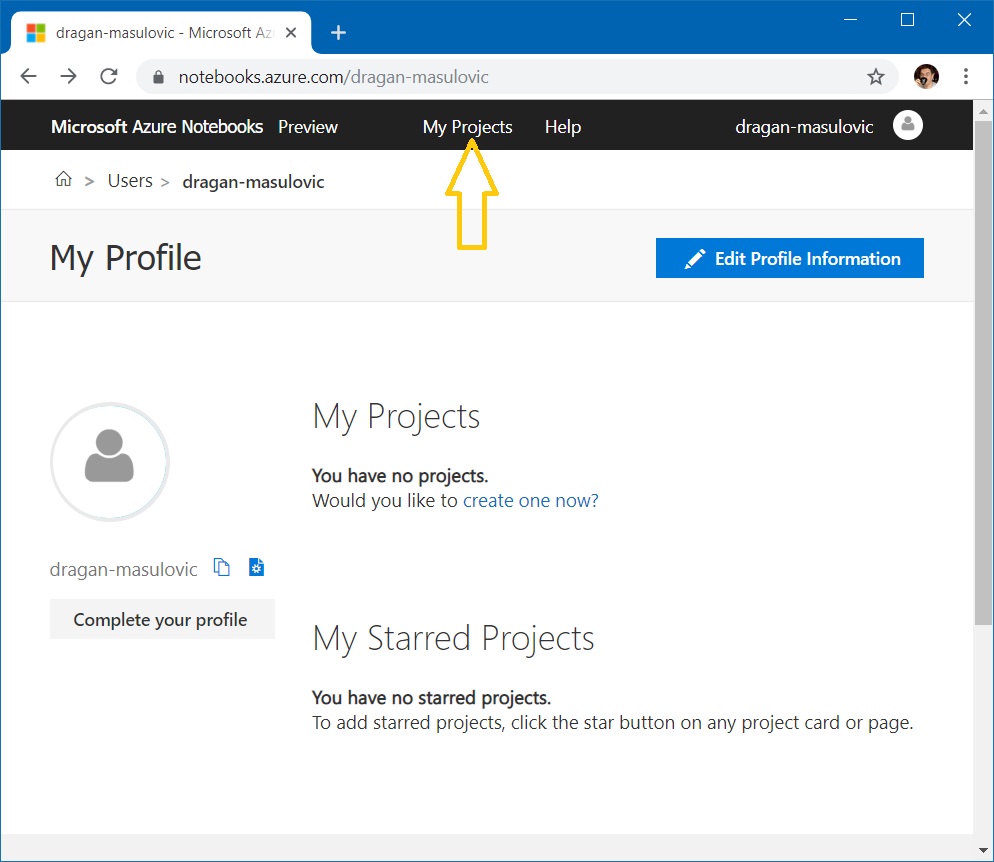
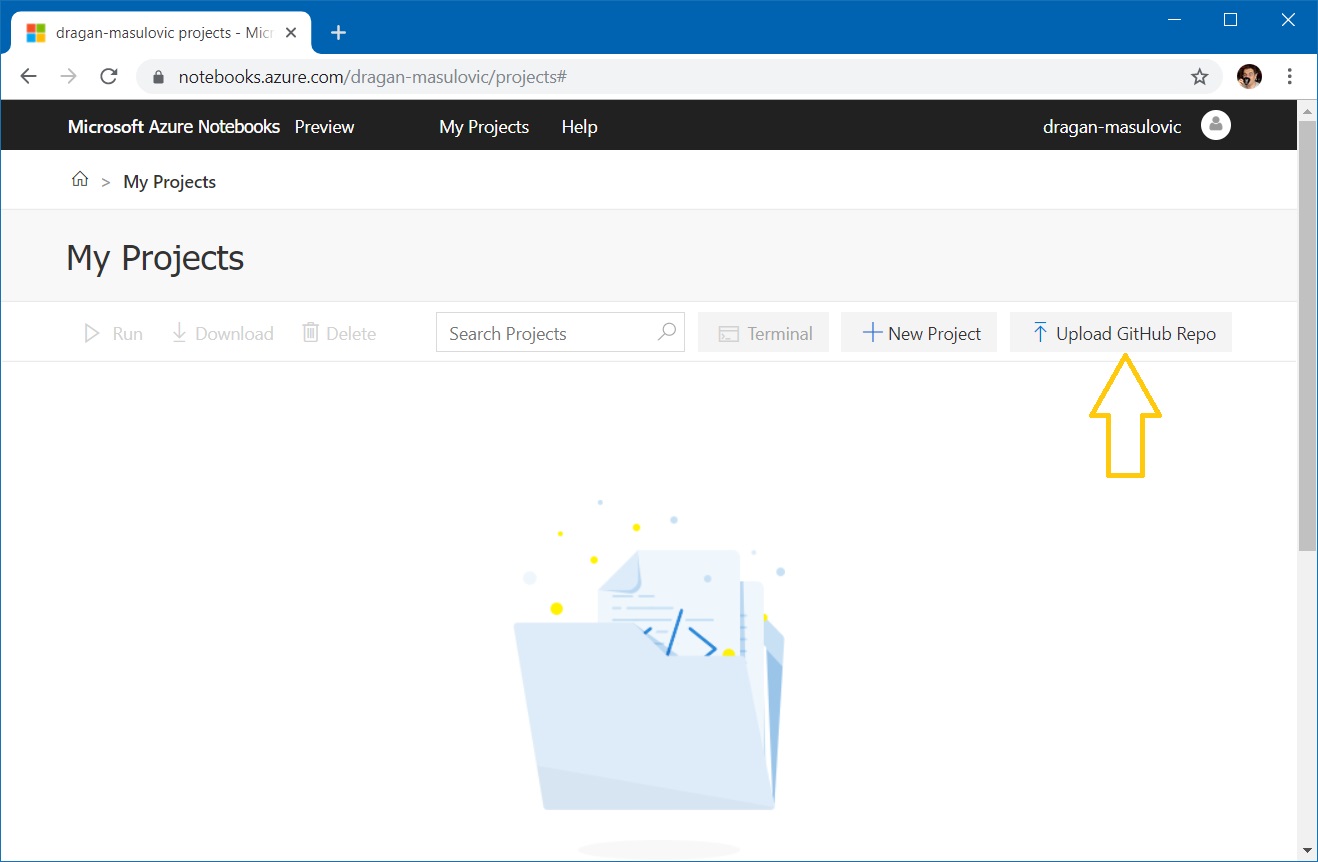
Step 2. After you log into Azure Notebooks go to My Projects
and choose Upload Github Repo:
Step 3. In the form that opens up locate the GitHub repository field and enter https://github.com/Petlja/JupyterBookEng (fill in the remaining fields in the form as you find convenient):
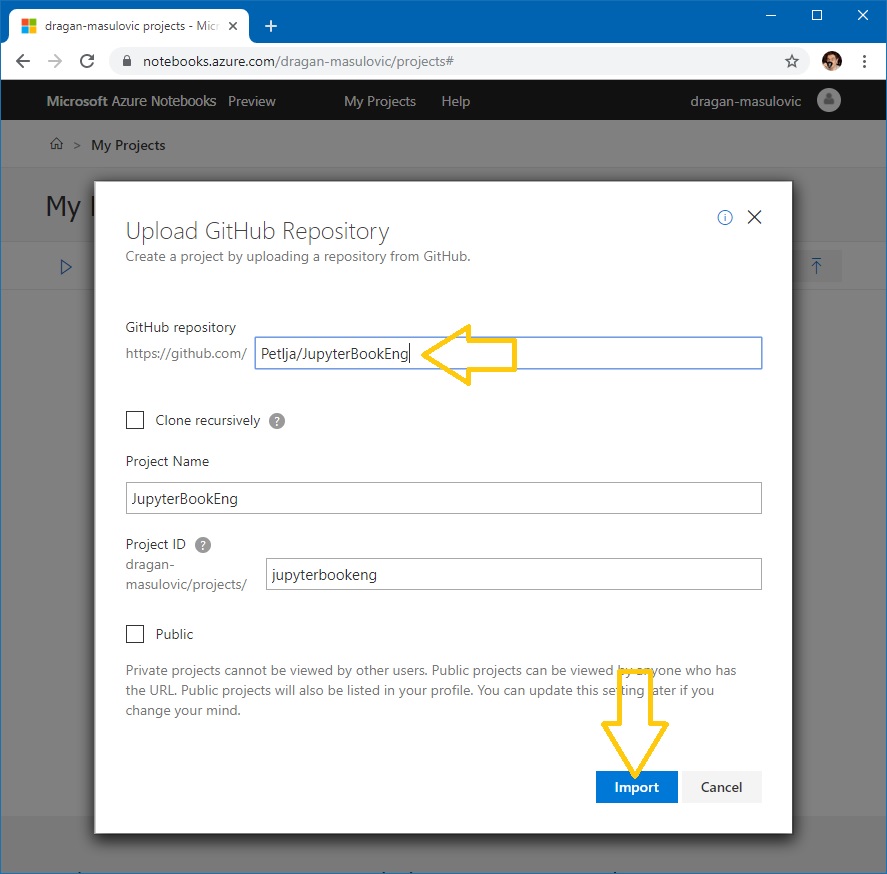
Step 4. Then click Import.
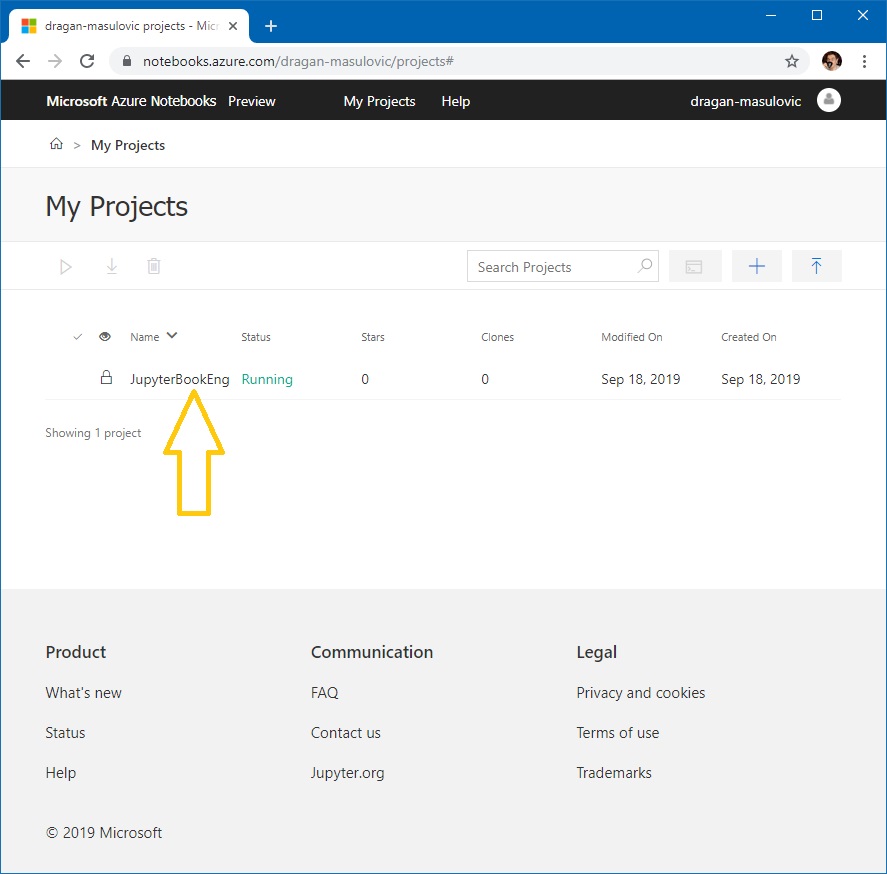
The list of your projects will now show a new project that you can open and execute.
0.3. Running Jupyter notebooks locally, on your computer
This is by far the most flexible way to run Jupyter notebooks, but in return it requires some preparations on your side.
Step 1. Install Pyhton (unless you already have a Python installation).
Step 2. Right-click on the following link
https://github.com/Petlja/JupyterBookEng/archive/master.zip
to download the master.zip file. Create a new folder and unzip the file there.
Open a command window (PowerShell, say) within the folder:
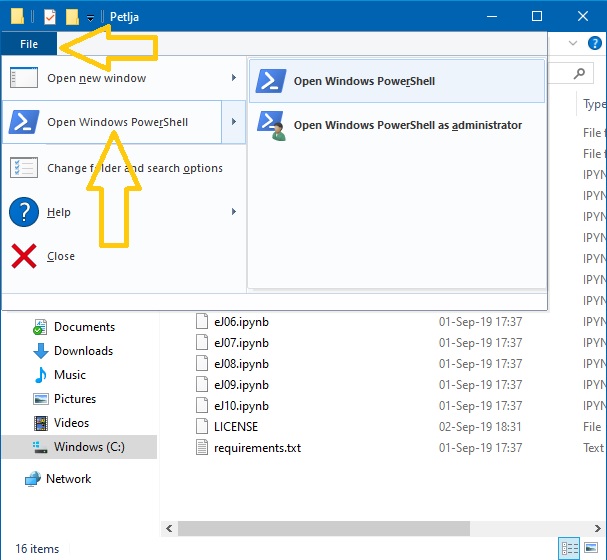
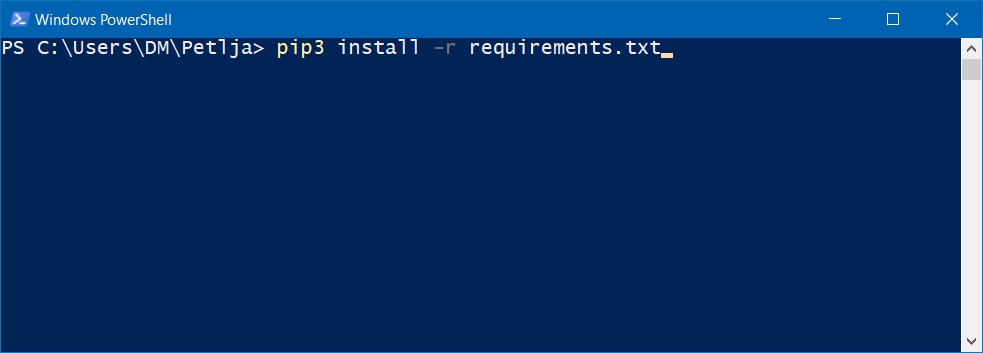
and execute the following command:
pip3 install -r requirements.txt
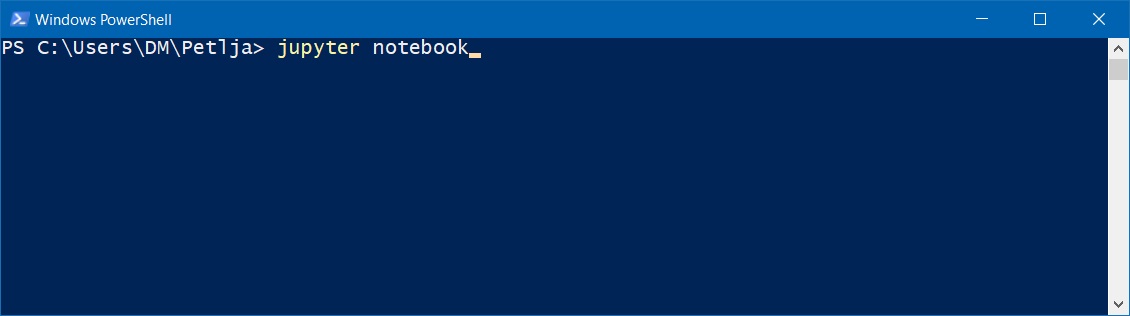
In the same command window enter
jupyter notebook
to start Jyputer:
Your default web browser pops up and displays a page that looks like this:
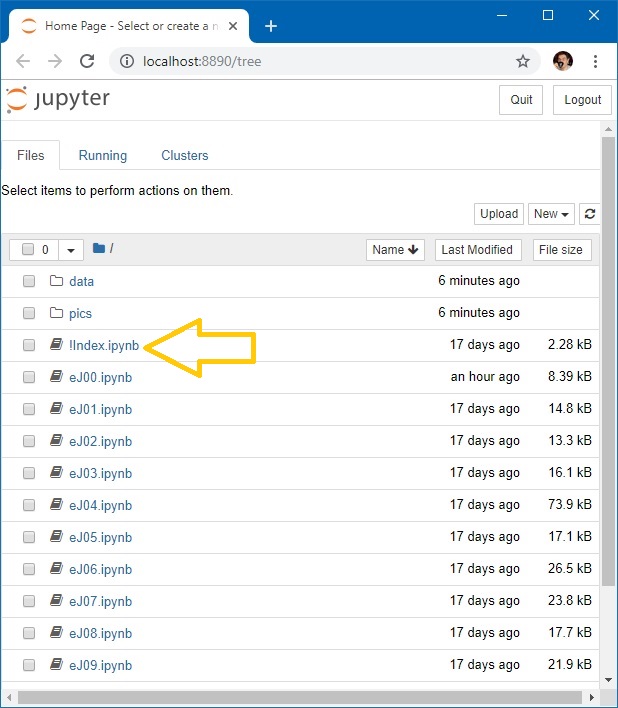
You can now click each of the links to run the notebook in a new tab. Switch to the tab that contains the notebook and execute it step by step.
