
Working with Blocks from the Radio Category
In this lesson, we will get to know the blocks from the category  , i.e. the blocks which are used for establishing a connection and communication between two or more Micro:bit devices. As in this case we will not use Micro:bits, in the simulator screen there will be two Micro:bits displayed.
In the simulator, all created codes will work on both virtual Micro:bits.
, i.e. the blocks which are used for establishing a connection and communication between two or more Micro:bit devices. As in this case we will not use Micro:bits, in the simulator screen there will be two Micro:bits displayed.
In the simulator, all created codes will work on both virtual Micro:bits.
Create a program which, when button A is pressed, sends a random number from the interval 0 to 100. When this information is received, a light appears in the middle of the screen, forming a 3x3 square if the received number is even; otherwise, the value of that number is displayed.
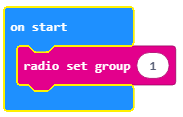
By creating an ID group, we actually create a space where the devices will communicate.
To create an ID group, we need to drag the block  from the category into the block
  . Into the input field for numbers and text, we can enter the desired number for the ID group, which can be any number. We will leave it to be 1. This way we created the ID 1 group, where both Micro:bits can communicate.
NOTE: When we use the blocks from the category Radio there will be two Micro:bits displayed in the simulator.
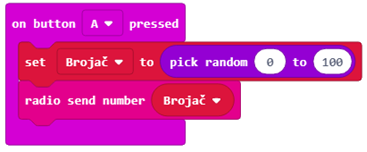
The variable Counter stores the value obtained from using the block  , or more precisely, the variable
 Counter receives one of the random values from the interval 0 to 100.
When button A is pressed, the Micro:bit sends the value of the variable Counter by using the block  from the category .
The look of the code:
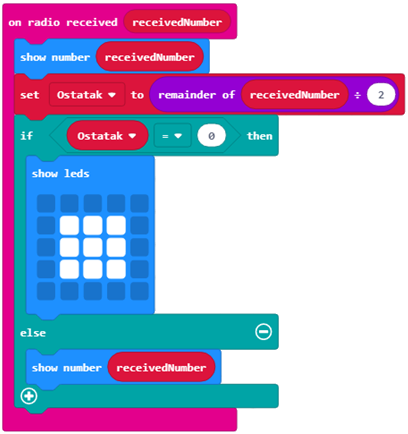
When the information is sent (in our case Counter), this information has to be received. Based on this information, the execution of the program is determined (the square will be displayed if the received number is even; otherwise, the value of the received number will be displayed). For this, we will drag a block from the category:
Into this block, we will drag the block which defines the variable Remainder, which stores the value for integer division of the Counter by 2:

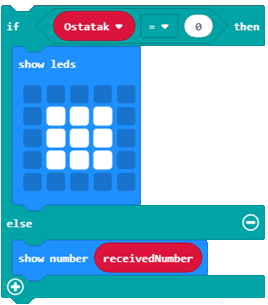
This is followed by the block 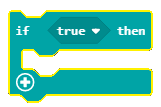 . In the part
  we will check if there is a remainder after the integer division of the Counter by 2. If this is true, a 3x3 square will be displayed. Otherwise, if the condition has not been fulfilled, which means that the remainder is not 0, the value of the variable
 Counter will be displayed:
The final look of the code:
Link for the code: https://makecode.microbit.org/_f31EfHcv6Kpy
To test the program, we will run it in the simulator by clicking the  button.
- When the data is received, nothing will be displayed.
- The answer is correct!
- When the data is received, the LED with coordinates (2,2) will be turned on.
- The answer is not correct!
- When the data is received, the message "Hello" will be displayed.
- The answer is not correct!
Q-13: Study the blocks carefully.
What will be displayed after the execution of the blocks above?
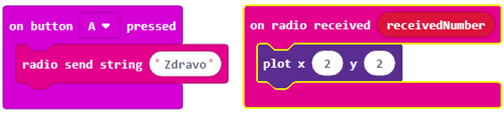
Task. Arrange the blocks so that they simulate the operation of a Telegraph, more precisely when the signal (number) is sent, LEDs are turned on in randomly chosen locations.
Little help: The values of the coordinates x and y are from the interval 0 to 4.
Compare your solution with one of our solutions: https://makecode.microbit.org/_JgFC5vRpudkq