
Project Task - Using the Sensors
Using the Touch Sensor
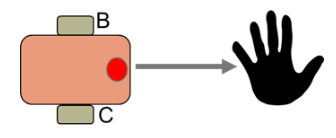
First, we will create a program that allows the robot to move until the user touchs the touch sensor with his/her hand. The goal of this program is to keep the robot moving until someone touches the sensor.
Based on the setup of the task, the robot should move forward. We will achieve this by adding the block  (the robot moves forward).
The next step would be to drag the block  from the category
  . From the drop-down list of this block, we will choose the option 1, which represents the port connected to the touch sensor.
Then, we need to choose the option pressed, which represents the condition of the touch sensor. (When a hand touches the sensor).
Afterward, based on the setup of the task, the robot should stop, which will be achieved by adding the block
. From the drop-down list of this block, we will choose the option 1, which represents the port connected to the touch sensor.
Then, we need to choose the option pressed, which represents the condition of the touch sensor. (When a hand touches the sensor).
Afterward, based on the setup of the task, the robot should stop, which will be achieved by adding the block 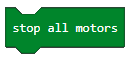 . This way, the robot is stopped.
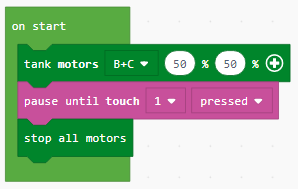
The look of the program:
Connect the EV3 Brick to the computer via USB cable and download the .uf2 file to your computer by clicking the button  . By dragging the file onto the EV3, it is ready to start working.
Using the Color Sensor
The color sensor is a digital sensor that can detect the color or intensity of light that enters through the small window on the face of the sensor. This sensor can be used in three different ways:
Color Mode,
Reflected Light Intensity Mode, and
Ambient Light Intensity Mode.
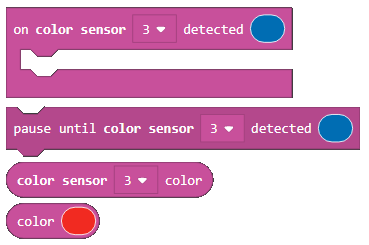
In Color Mode, color sensor recognizes seven colors - black, blue, green, yellow, red, white, and brown plus no color:
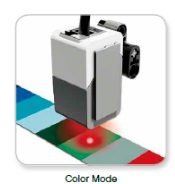
This ability to differentiate between colors means that the robot can be programmed to sort colored balls or blocks, say the names of detected colors, or stop when it sees red.
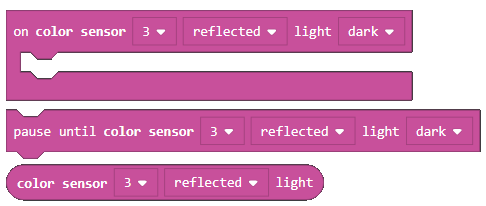
In Reflected Light Intensity Mode, color sensor measures the intensity of reflected light. The sensor uses the option dark (very dark) and light (very light). This means that the robot can be programmed to move around on a white surface until it detects a black line or to interpret the color-coded surface of an identification card.
In Ambient Light Intensity Mode, color sensor measures the strength of light that enters through the window from its environment, such as sunlight or beam of a flashlight. The sensor uses the option dark (very dark) and light (very light). This means that the robot can be programmed to set off a wake-up alarm when the Sun rises in the morning, or to stop working when the lights go out.
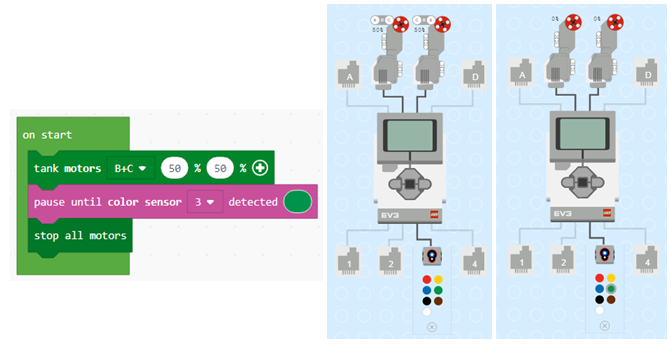
We will demonstrate the use of the color sensor by creating a program, which will allow the robot to move until it sees the color green. When the robot sees green, it will stop.
Based on the setup of the task, the robot should move forward. This will be achieved by adding the block (the robot moves forward). Then, from the category we will choose the block  . From the drop-down list of this block, we will choose the option 3, which represents the port connected to the color sensor. The next step is choosing the color from the drop-down list
  by clicking on the desired color (in our case green). And then, based on the task conditions, the robot should stop, which will be achieved with adding the block . This way, the robot will stop.
The code of the program and the look of the simulation (the robot is moving until it sees the color green):
Connect the EV3 Brick to the computer via USB cable and download the .uf2 file to your computer by clicking the button . By dragging the file onto the EV3, it is ready to start working.
Using the Ultrasonic Sensor
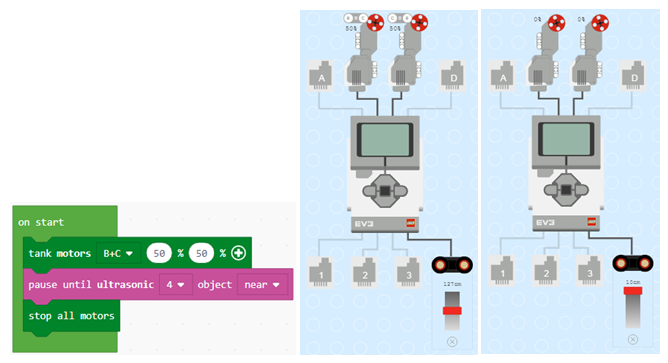
We will demonstrate the use of the ultrasonic sensor by creating a program, which will allow the robot to move until it comes across an obstacle.
Based on the setup of the task, the robot should move forward. This will be achieved by adding the block (the robot moves forward).
Then, from the category we will choose the block  . From the drop-down list of this block, we will choose the option
 4, which represents the port connected to the ultrasonic sensor. From the drop-down menu  we will choose the option
 near. Since based on the task conditions, the robot should stop. This will be achieved with adding the block . This way, the robot will stop.
The code of the program and the look of the simulation (the robot is moving until it sees an object):
Connect the EV3 Brick to the computer via USB cable and download the .uf2 file to your computer by clicking the button . By dragging the file onto the EV3, it is ready to start working.