
Project Task - Middle Button
A variable stores values that we can later use in the program.
A variable can be:
Numerical (stores a number)
Logical (stores logical values true/false)
Textual (store text “Hello”)
A variable can be understood as a space in the computer memory, something like a box, in which, during the execution of the program, we can store some interim values. Variables have names. When we want to use the value of the variable, it is enough to use its name.
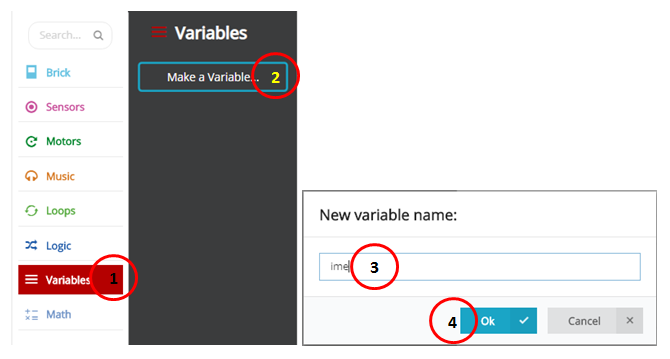
A variable is created in the following manner, in the category Variables (1), click on the button Make a variable (2) and type in the name of that variable in the field (3). By clicking the button OK (4), you have created a variable.
We will demonstrate the use of variables by creating a program, which displays how many times the user pressed the middle button on the EV3 Brick.
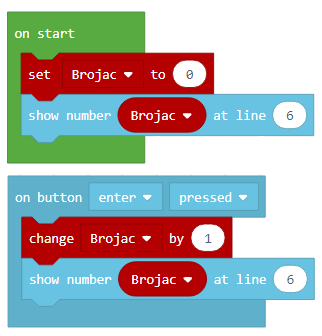
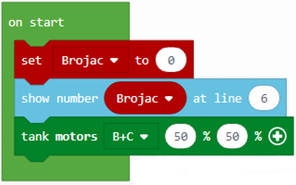
We need to create the variable  . We will set the initial value of the counter to be 0, by using the block
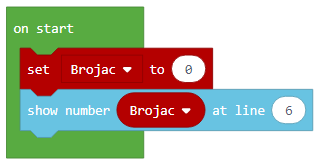
 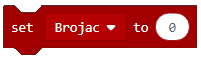 . We then drag this block into the block
  . Within this block, we will also show the value of the counter in the very beginning on the EV3 Brick screen by using the block
  .
.
The look of the code:
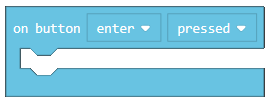
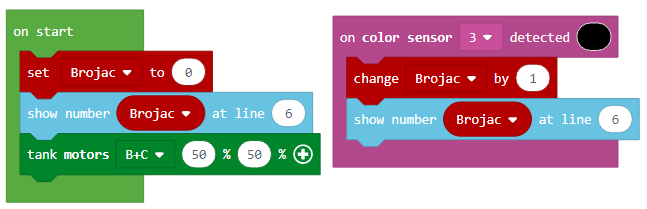
Based on the setup of the task, we need to register every time the user presses the middle button on the brick. This will be achieved by using the following block:
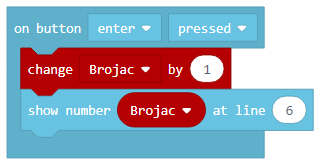
When the pressure made to the middle button of the brick is registered, the value of the counter should increase by 1. We can do this by using the block 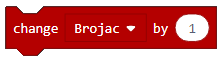 from the category
  . We will use the block to display the new value of the variable Counter.
The look of the code:
The look of the final code:
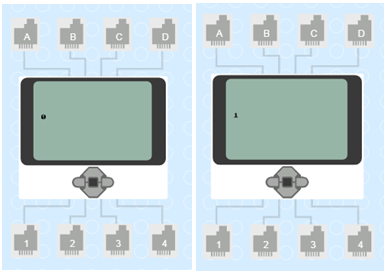
Connect the EV3 Brick to the computer via USB cable and download the .uf2 file to your computer by clicking the button  . By dragging the file onto the EV3, it is ready to start working.
Simulation:
We can demonstrate the use of variables with another example. We can create a program, which will count how many black lines the LEGO robot has crossed.
Let’s create the variable . Using the block , we will set the initial value to be 0.
We should then drag this block into the block . Within this block, we will also show the value of the counter in the very beginning on the EV3 Brick screen by using the block . We will also drag the block  into the given block, which will enable the robot to move continuously.
The look of the code:
Based on the setup of the task, we need the sensor to register black; this will be achieved by using the block that has the drop-down list from which we can choose the color black:

When the sensor registers black, it is necessary to increase the value of the counter by 1. We can do this by using the block from the category . For displaying the new value of the variable Counter, we will use the block .
Look of the code:

The look of the final code:
Connect the EV3 Brick to the computer via USB cable and download the .uf2 file to your computer by clicking the button . By dragging the file onto the EV3, it is ready to start working.