
Project Task - Forward and Backward
In more complex applications, it is necessary to perform an action several times, until some of the conditions for its termination are fulfilled.
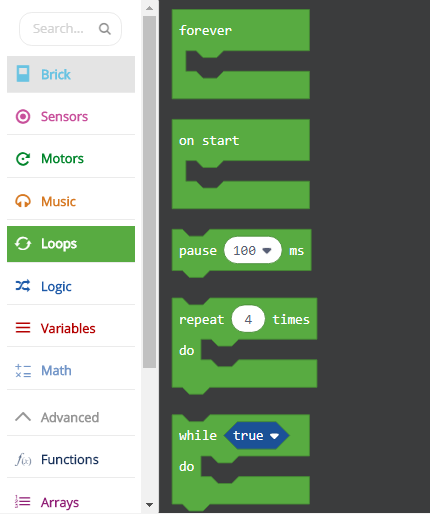
Loops provide the ability to repeat the same code sequence until one of the conditions for breaking it is fulfilled.7
The running of the loop can be controlled in a number of ways:
Unlimited (no limitations),
Sensor (it runs until the program reacts to one of the sensors),
Time (it can be time-limited),
Count (a number of times it repeats can be determined in advance) and
Logic (it can run until a logical condition has been fulfilled).
We will first explain the loops in a simple example of the infinite movement of a robot forward and backward.
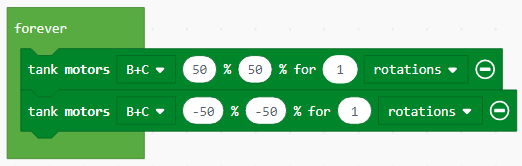
We will solve this task by dividing it into two parts. The first part will consist of two blocks with which the robot will move forward and backward.
Drag the block  to the work surface, click on the sign
 + and choose the option “rotations”. Then, set the number of rotations to 1.
Finally, for the robot to move forward, the value (representing power) has to be positive, we will set it to be 50.
In the second block, we will set the power of the motor to be -50, so the robot can move backward. To allow the robot to move continuously (without stopping), we need to put the block presented above into an infinite loop, we will achieve this by adding the block  , which will enable the robot to go forward and backward continuously (an infinite number of times), until the program is stopped by force.
The look of the program:
Connect the EV3 Brick to the computer via USB cable and download the .uf2 file to your computer by clicking the button  . By dragging the file onto the EV3, it is ready to start working.
We can also limit the robot’s movement; for example, we want the robot to move forward and backward three times.
To do this, we will use the loop where blocks run a determined number of times. The robot will move forward and backward three times.
To set the code sequence to stop after a certain number of repetitions, you need to drag the block 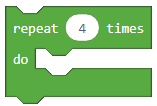 , where we will define how many times an action should be repeated, into the block
  . In our case, the value will be 3.
The look of the program:

Connect the EV3 Brick to the computer via USB cable and download the .uf2 file to your computer by clicking the button . By dragging the file onto the EV3, it is ready to start working.
The third way we can repeat a certain action is by using the block that will repeat it until a specified condition has been fulfilled. This block should be used when we don’t know how many times we need to repeat some part of the code, so we want it to keep repeating until a specific condition has been fulfilled.
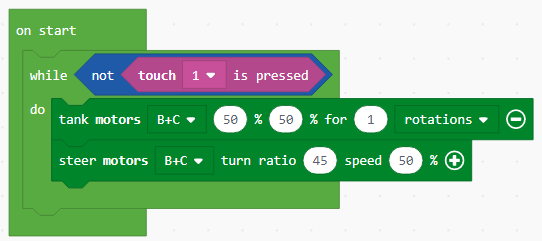
To demonstrate conditional repetition, we will create a program which will allow the robot to move around a box in the shape of a square until it encounters an obstacle (touches the box).
The code looks like this:
Connect the EV3 Brick to the computer via USB cable and download the .uf2 file to your computer by clicking the button . By dragging the file onto the EV3, it is ready to start working.
This task can be solved by using functions.
Some complex problems can be solved more easily if they are divided into smaller units that can be solved independently. In other programming languages, these units are called subprograms: functions and procedures. We know that we can simplify the code by using repetition commands. However, this is often not enough.
Whenever we want the robot to repeat some activity within a program, or in another program, we can use procedures, or more specifically, the block  .
.
Since we have been using the forward and backward motion of the robot in our previous examples, we will try to use these two blocks to create our own function forward and backward. How is this done?
The first step is to create the Function with activities which will be repeated. In our case, this will be the robot moving forward and backward repeatedly.
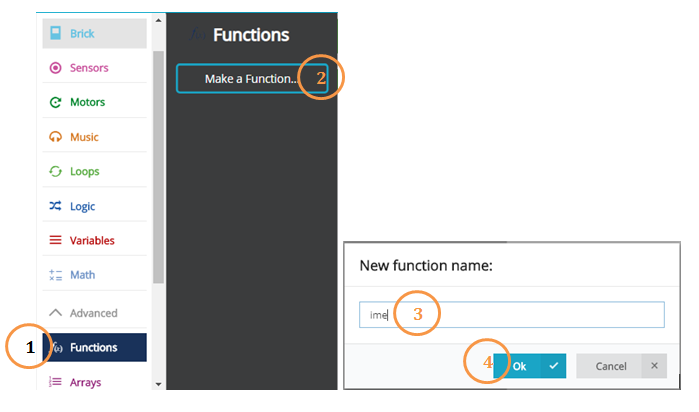
We create a Function by, opening the category Function (1), clicking on the button Make a Function (2) and entering the name of the function we would like to create (3). We have finished creating a function when we click on the OK button (4).
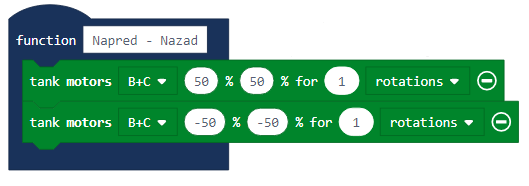
Add the two movement blocks, the first block will enable the robot to move one rotation forward, and the second block will enable it to move one rotation backward.
Look of the function forward and backward:
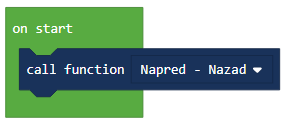
In order for a function to be used in a program, it is necessary to “call” it using the block 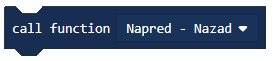 .
.
The look of the code for moving forward and backward by using the function:
Connect the EV3 Brick to the computer via USB cable and download the .uf2 file to your computer by clicking the button . By dragging the file onto the EV3, it is ready to start working.